Lab 1: Going Viral
Monday, January 27, 11:59pm EST
Learning Goals
- HTML: Understand and implement the basic structure of an HTML page and how to use tags to create content.
- CSS: Learn how to style HTML elements using CSS.
- iframe: Be able to share content from another website on your own using an iframe.
- Social Computing: Create content that is designed to go viral and reflect on the process.
Before you begin...
This lab consists of two parts. In Part 1 you will learn how to create your own website (hooray!) and in Part 2 you will create memes with the potential to go viral, post them on social media, and embed the post in your website.
Overall, our goal in designing assignments is to push us not just on understanding the concepts discussed in lecture, but in appreciating the challenges of putting those concepts into practice. Reading and writing essays is important, but we don't really improve our design skills if we don't wrestle with it in practice. One of the most dangerous ways to run this class would be to teach design concepts but then have all the assignments only be written design analyses of existing systems, like asking students to analyze the design of an existing community and suggest improvements. I say "dangerous" because design analyses alone can instill a false sense of confidence in our ability to do design well ourselves and in how simple it would be to fix complex socio-technical systems. By doing it ourselves, we learn how challenging and unpredictable social computing design really is, and develop skills for being effective at it.
So, assignments in this class will be challenging you to synthesize the lessons in the course into creating and populating social spaces. This means that you'll be interacting with and recruiting friends, family, and colleagues online throughout the semeseter for assignments and projects. Take this course only if you feel comfortable with these activities.
Furthermore, it is important to take seriously the responsibility that we have as social computing designers to mitigate harms and risks to people who use our systems. We have designed our assignments with the goal of maximizing pedagogical value and minimizing risks. We are trusting you to act in good faith to create positive outcomes. That's the Social Computing Fundamental Standard: use reasonable judgment to (1) create joy and meaning in peoples' lives, and (2) mitigate risks and harms.
We do this because the last two decades in tech have proven to me that it's critical that we learn to do this design well, and in order to learn to do this design well, we need spaces for deliberate practice.
Requirements
By the deadline, you should have:
- Create at least two memes and post one on a social media platform of your choice. See rules below.
And your repository should contain: 2. Three HTML files:
index.htmlthat includes hyperlinks to the other two pagesabout_me.htmlmemes.html
- A folder called "validation" with three screenshots of the result of the W3C HTML Validator for each of the three HTML file. All HTML files should receive a "passed" rating. You have to upload each file individually. Section 1.1.5 explains why validation is important.
- Each HTML file should contain the following:
- An appropriate title
- Relevant headings
- Different CSS styling for each page (font color, font size, background color, etc.)
- The
about_me.htmlfile should contain:- A paragraph about yourself
- An image or a drawing of you
- Your responses to the "Seven Whys" exercise in a bulleted list
- The
memes.htmlfile should contain:- Two embedded images/videos:
- (1) Your most viral meme posted on a social media platform
- (2) One other meme that you created but did not post and/or did not go viral
- Evidence of virality and your definition of "viral"
- A link to the post in plain text (no
atag) - A brief reflection of no more than 600 words that explicitly integrates concepts discussed in class:
- How you iterated on the meme(s) you created
- The rationale for choosing a particular platform
- In what larger context (e.g., current events, online subcultures) was the content created?
- Who was the intended audience?
- Why or why not did the meme go viral?
- This analysis is important: even if you don’t have a lot of social media access, you can still analyze your design and performance.
- Two embedded images/videos:
If you are not comfortable posting to a social media site publicly, you can post to a private group or page and share a video recording or screenshot with me. You can also post anonymously and/or create "finsta"-type accounts instead of using your "rinsta" account. If you have any concerns about this assignment, please reach out to me.
Clone Your Repo
Get your Lab SSH URL from the CS77-S25 GitHub organization. The repository to clone is named Lab1-<userID>.
$ git clone [your lab1-userID url]
$ cd lab1-userID
$ ls
about_me.html  index.html  memes.html
Part 1: Hello World... Wide Web
The language you're most likely to interface with on a computer is probably not C or Assembly, but rather HTML. It stands for Hyper Text Markup Language… which might sound like gibberish to you. In HTML, with few exceptions, we only specify what we want to do, i.e., "mark up." It is with CSS or Cascading Style Sheets that we specify how we want to do it, and that’s covered in the later sections.
1.1 HTML
HTML is a language for “marking up” text - saying “this text here is a subtitle”, or “this text here should be emphasized” - stuff like that. It’s the language that web browsers understand, and it’s the language that we use to tell web browsers what to display on a webpage.
Using HTML, we specify what we want the webpage to do. However, it’s important to distinguish between this and how we want the webpage to do it. For instance, what we want to do might be to make certain text show up as a title. How we do it is by making it a little bigger and bolder than the surrounding text (and put it on its own line).
For example, consider the following line of text:
My cat is very grumpy.
If we wanted the text to stand by itself, we could specify that it is a paragraph by enclosing it in a paragraph (<p>) element:
<p>My cat is very grumpy.</p>
There are a couple of things to note about this example. The first p tag is an opening tag. Second, notice how there is a forward slash in the second p tag? That indicates that it is a closing tag. Everything in between the opening and closing tags is affected by the tag.
You can place tags inside of each other. This is called nesting tags in programmer speak. For example:
<p>My cat is <i>very</i> grumpy.</p>
Thus, in this example, the word very will be affected by the i and p tags, but the other words will not be affected by the i tags. Pretty simple so far, right?
1.1.1 Tags
HTML consists of a series of elements, which you use to enclose, wrap, or mark up different parts of content to make it appear or act in a certain way using tags.
Tags get more fun once you have a couple to play with. Here are some basic tags that you should know about as a novice HTML coder. Remember that these are all opening and closing tags - they affect the text that they enclose. We’ll talk about the second type of tag soon.
i: This stands for emphasis and is used when you want to emphasize text. By default, this will render as italic.strong: This is used for text that is strongly important. By default, this renders as bold.h1: This stands for header 1 and is the largest type of header, or page title. There are also tags h2 through h6. They get progressively smaller, and are used for subheaders or subtitles. By default, this will render as bold, large text on its own line.p: This stands for paragraph and should be used to enclose paragraphs of text. By default, this will have the effect of pressing enter on your keyboard twice before the paragraph.olandul: These are ordered list and unordered lists, in other words: numbered lists and bulleted lists. Inside the list, each item should be within anli(list item) tag.div: This stands for division, in other words, a section of the page. This is a versatile tag used to organize more complex HTML into sections. We will use this one more in the CSS section.
For example, check out the following code. Can you guess what it will look like?
<h1>My Cat Toaster</h1>

<p>Toaster is a <i>very</i> grumpy <strong>cat</strong></p>

<ol>
    <li>Oh, Toaster the cat with a permanent frown,</li>
    <li>The grumpiest feline in all of the town.</li>
    <li>With fur of deep gray and a tail that’s a swish,</li>
    <li>He’d hiss at your love and growl at your fish.</li>
</ol>

<ul>
    <li>But deep in the night, when the moon softly glows,.</li>
    <li>Toaster reveals what no human knows.</li>
    <li>A twitch of his whiskers, a purr in his sleep,</li>
    <li>A secret so sweet, his grumpiness keeps.</li>
</ul>
You can run this code yourself to find out.
- Create a file named
my_cat.htmlusing your terminal. You can name it anything you want, but make sure it ends in .html! - Open the file using your favorite text editor.
- Copy the above example code the file, and save the file.
- Open the file in a web browser to see your HTML in action.
Once you have this file, you can make changes to it and then refresh the page in your browser to see your changes. Try it:
- Add
<h2>May His Reign Be Long and Peaceful</h2>on a new line after theh1code. - Save the file.
- Refresh the page in your web browser to see what your new line of code does!
1.1.2 Attributes
Next, let’s talk about the a (or anchor) tag. With this tag, we introduce something called HTML attributes, which are certain traits that a tag can have. HTML attributes go inside of the opening tag and always have the syntax of ATTRIBUTE="VALUE", where the value is always in quotes. This will make more sense if we look at an example.
The anchor tag is what we use for links. It has an attribute called href, or hyper reference - the URL of the page that the link goes to. For example, take a look at the following code:
<a href="https://drive.google.com/file/d/16apzg01S4Tgvayjap7LLlXalKa8rKsxL/view?usp=sharing">Click Here</a>
What this will render is a link that says “Click Here”. If you click the link, you’ll be taken to whatever URL is the value of href - in this case, a picture of my cat.
In the last section, you saved an HTML file my_cat.html to your computer.
- Now, save a new file called
about_me.htmlwith the following contents:
</p>
<h1>About me</h1>
<p>I'm learning HTML and CSS! My favorite animal is a ____.</p> <!-- there's only one right answer -->
Make sure to save about_me.html in the same folder as where you have my_cat.html.
-
Now, let’s learn how to link to your new page. In
about_me.html, add a new line somewhere in the file that says:<a href="my_cat.html">My Cat</a> -
Save it and open
about_me.htmlin your web browser. Now, if you click the link, it will take you to the page about Toaster.
NOTE: The value of the href in this example is my_cat.html, a relative path. Instead of containing the full URL, relative paths are relative to whatever folder you are currently in. In this case, it will look for a my_cat.html file in the same folder. So this allows you to link to a different HTML file in the same folder.
1.1.3 Standalone Tags
Tthere are two types of HTML tags. One of the types is the opening and closing tags. That makes sense for things like emphasizing text, because it encloses the text that you want to be affected. Some things, though, like images, just stand by themselves and don’t need to enclose anything. These are made using stand-alone tags. Take a look at the br tag as an example: <br>.
Pretty simple, right? It’s just like the opening tags we already learned about, but without a closing tag. By the way, what the br tag does is make a line break. It’s the same as pressing enter on your keyboard once.
The br tag is super simple - that’s all there is to it. A more interesting stand-alone tag we can learn about is img, the image tag. This has the important attribute src, which should have the URL of the image as its value. It can also have width and height attributes, which are specified in pixels, to tell you how big the image should be. For example, consider the following code:
<img width="300" height="300" src="https://drive.google.com/thumbnail?id=16apzg01S4Tgvayjap7LLlXalKa8rKsxL&sz=w1000">
This is an example of how to use a tag with multiple attributes, in this case, the width, height, and image source (src). As you can see, it’s quite simple - each attribute is in the form of ATTRIBUTE="VALUE", just as we learned in the last section, with spaces to separate them.
What will the code above look like? It’s time to…
The image above isn't quite right. Try to fix it by changing the width and height attributes.
- Open your
my_cat.htmlfile from before. - Add the img code above somewhere in the file, and save it. Open the file in your web browser (or refresh the page if you already have it open), and voila!
Now, try saving the image to your computer and loading it from your computer instead:
- Right-click the image and save it as
toaster.png. Save it in the same folder as yourmy_cat.htmlfile. - Change your
imgtag to the following:<img width="1000" height="1000" src="toaster.png"> - Now refresh the page in your web browser and the image should still show up! Except now it’s using the image hosted locally on your computer.
1.1.4 Structure of an HTML Page
Now that you know a bit of basic HTML, let’s talk about the structure of an HTML page. While you can write any HTML into a file and run it, web pages have a particular HTML structure that can be followed. Following this structure will ensure your web page runs correctly even as it gets more complicated.
First, all HTML documents have to start with a special line that declares that the document type is HTML. This line looks a bit like a tag, but it’s actually not an HTML tag, it’s a “declaration”. It tells the web browser what type of document it is, in this case, HTML:
<!DOCTYPE html>
Whenever you make an HTML file, be sure to write this as the very first line.
Next, the entire document is enclosed within html tags, which acts as a container for everything else. Within this, our HTML page is split into two parts, which are also opening and closing tags: a head and a body.
<!DOCTYPE html>
<html lang="en">
  <head>
  </head>
  <body>
  </body>
</html>
Inside the head, we place information about the page which isn’t directly visible on the page. One such tag is the title tag, which controls the text displayed in the top of the browser tab.
Inside the body tag is where our actual visible HTML elements go. This is where we can write paragraphs of text, titles with the h1 tag, and more.
So for example, a simple page could look like this:
<!DOCTYPE html>
<html lang="en">
  <head>
    <title>About Me</title>
  </head>
  <body>
    <h1>Welcome to my web site!</h1>
    <p>Thanks for visiting today!</p>
  </body>
</html>
Try copying this into a new file with a .html extension, and open it in your browser to see what it says. You’ll notice that it says “About Me” in the browser tab, which is the result of the title tag. Then, on the actual page, you’ll see what’s in the body.
1.1.5 Validating Your HTML
HTML is a markup language. Every language has its own grammar, vocabulary and syntax, and every document written in a particular language is supposed to follow those rules. With HTML, it's easy to miss a closing tag or incorrectly use an attribute, and these mistakes can cause your web page to display incorrectly. Web browsers are actually very tolerant of mistakes and try to render the HTML as best it can no matter how broken it is. For example, you can create a page missing several closing tags and it will still render something. So just because the HTML renders in the browser doesn't mean all is well. There are no rules as to how invalid HTML should be handled, which is why every browser handles these mistakes in different ways. So it's important to always try and serve up valid HTML.
To avoid these issues, you can use an HTML validator to check your code for errors. The W3C Validator is one of the many HTML validators that checks your HTML markup to see if you are following the rules for constructing proper HTML. The process of verifying whether a document actually follows the rules for the language(s) it uses is called validation, and the tool used for that is a validator. A document that passes this process with success is called valid. Thus markup validation is the process of checking a Web document against the grammar (generally a DTD) it claims to be using.
1.2 CSS
Remember how I said that HTML tells the webpage what to do? Well, CSS tells you how to do it. For example, HTML might tell you that you want to emphasize a piece of text. It’s the CSS that tells you how the text will be emphasized - perhaps you want it to be both bolded and italicized, as well as bright pink. You can do that with CSS, and more.
1.2.1 Adding CSS to Your HTML Page
Let’s say you have a bit of code like the following:
Wow, much beautiful. So <strong>wow</strong>.
If that’s all you have (no CSS), it will look something like this: Wow, much beautiful. So wow. By default, the strong tag simply bolds the text. But let’s say we want to make it fancier. Using CSS, we can change the way the strong tag affects the text. We can make all strong text purple,
or underlined,
or bigger, for example.
Your CSS code has to go in between style tags. The style tag should have an attribute type with the value “text/css”, to tell it that we’re using CSS. Inside of these style tags, we can style things by putting the name of what we want to style in front of curly braces, and putting our styles inside of the curly braces.
That probably sounded a little confusing, but it should make more sense with an example:
<style type="text/css">
    strong {
      color: #eeeeee;
    }
</style>
Notice how we have strong right in front of the curly braces. This tells us that we’re changing the way the strong tag affects the text. Inside of the curly braces, we can list our CSS properties in the format:
property: value;
In this case, the property is color and the value is #eeeeee.
In this example, we are setting the color to a hexadecimal color code, #eeeeee, or light gray. Now, if we use the same HTML, we get a different result: Wow, much beautiful. So wow.
Well, we can’t see that very well. Luckily, there’s another property we can change that might make that text easier to see. The background-color attribute will change the background color of whatever you are styling. Let’s add a line for background-color, changing it to #000000, or black:
<style type="text/css">
strong {
	color: #eeseeee;
	background-color: #000000;
}
</style>
Now, our HTML will render like this: Wow, much beautiful. So wow.
Mozilla provides an excellent resource to learn about the many, many different CSS attributes that you can use. Check it out here.
1.2.2 Adding CSS to the Page
Now you might be wondering… where does the style tag go in an HTML page? The answer? It goes inside the head section. Here’s an example of what your entire page might look like now:
<!DOCTYPE html>
<html lang="en">
  <head>
    <style type="text/css">
    strong {
      color: #eeeeee;
      background-color: #000000;
    }
    </style>
  </head>
  <body>
    Wow, much beautiful. So <strong>wow</strong>.
  </body>
</html>
Now you should have a basic idea of what CSS is, how to use it, and what you can do with it. Just like we styled the strong tag, we can also style other HTML tags, like p, h1, em, and more. You can even style the entire page using the body tag.
1.3 iframe: The Inline Frame
The <iframe> HTML element represents a nested browsing context, embedding another HTML page into the current one.
Paste the following code into your about_me.html file's body section:
<iframe
id="inlineFrameExample"
title="Inline Frame Example"
width="500"
height="5 00"
src="https://www.openstreetmap.org/export/embed.html?bbox=-75.3671979904175%2C39.89539873716747%2C-75.34737110137941%2C39.91039460093903&layer=mapnik">
</iframe>
- Because each browsing context is a complete document environment, every
<iframe>in a page requires increased memory and other computing resources. While theoretically you can use as many<iframe>s as you like, check for performance problems.
Part 2: Make a Meme
This kickoff assignment is an exercise in the challenges of designing something that spreads online. Your challenge is simple: create something that goes viral.
You can create any content you want: memes, videos, opinion essays, collective action activism, photoshops, a collective fiction writing effort, and so on. It needs to be spreadable online. Common platforms might include TikTok, Instagram, Facebook, Reddit, Twitter/X, Mastodon, YouTube, Medium, or blogs/news outlets.
You do not necessarily need to try and go viral across the whole internet. You can target a more focused community that you belong to. Make sure you can explain to the staff in your writeup what that community is, and why the piece is designed to go viral in that community. However, think carefully about the norms of the community you're posting to before submitting. For those of you who are not active on social media, here are a few platforms you can join without using your real identity: Reddit, TikTok, and Instagram.
2.1 Iterate
Do not expect that your first attempt will go viral or gain much traction. Reflect on what's working and what's not — lecture concepts may help diagnose here — and try something else. Your written reflection will tell us about what you learned through this iteration process. While I won't grade you down if you iterate and nothing goes viral, we will consider whether your meme is a fit for the communities where you post it, and whether it can reasonably spread there: for example, don't push your meme to a WhatsApp group that has only seven people. Remember, a requirement is that you create at least two memes.
Upworthy recommends that you try writing out 25 different versions of the main text or headline before posting — that the first ones will feel awkward and ridiculous, but you need to push through the awkwardness and keep going to find the best way to phrase your idea.
2.2 The Rules
- No negativity: create joy, not pain. Follow the Social Computing Fundamental Standard, and use reasonable judgment as to what content is off-limits for a course, including targeting groups that other community members belong to, personal attacks, libel, slander, harassment, pornography, and bullying; check your idea with the staff if you're not sure.
- No CS77 meta-memes. This means no memes about the course or the department, and specifically, memes that say "my professor wants me to go viral, help me go viral.” Seriously. Don't do it. 50% points off if you do.
- You must create the content, not share someone else's content. However, you may remix someone else's content (with attribution/permission as appropriate) to create yours if desired.
- This meme must be new content created for this class: you cannot reuse something that you previously created or shared.
- Collect evidence of your meme's virality. In some cases this is easy, such as retweet, view, or upvote counts; in other cases it might require more creativity, such as analytics trackers (e.g., Google Analytics) if you created a web page or asking around to find out where your emails got forwarded to.
Helpful hints based on what worked (and didn't work) for students in the past
- Be mindful of the platform you are posting in. If you are posting on a Swarthmore meme forum, for example, make sure it’s relevant and particularly resonant for those at Swarthmore. Some of the most viral submissions from last year were in non-Swarthmore communities. Create several pieces of content and iterate on failed viral attempts, even trying similar things on different platforms. (Something could bomb on Facebook but see success on Reddit).
- The best write-ups showed an attention to learning from failure and iterating, despite initial attempts that did not go viral.
- Timing matters. People are less likely to share or upvote something that becomes less original as a type of joke becomes saturated. So get creative!
2.3 Embed Your Memes' iframes in Your Website
In your memes.html file, embed the most viral meme you posted on a social media platform using an iframe as described above. Also embed at least one meme that you created but did not post and/or did not go viral.
- Different websites have different ways of obtaining iframe or embed links; you'll need to do some research to figure out how to embed content from a specific social media site on your website. If the website doesn't have an iframe option, you can take a screenshot of the post and embed the image in your website along with a link to the post.
Submission Instructions
Submit your assignment by committing and pushing your changes to your GitHub repository:
$ git add <changed file1> <changed file2> ...
$ git commit -m "Lab 1 completed. We're influencers now!"
$ git push
Make sure you have the appropriate files and images in the correct folders as described in the requirements above.
Grading
Grading Rubric
| Category | Insufficiency | Adequacy | Proficiency | Mastery |
|---|---|---|---|---|
| HTML Validation (5 points) | 2+ HTML files have errors | 2+ HTML files have warnings | 1 file has warnings | There are no warnings or errors validation |
| HTML Content (5 points) | Missing most required content, e.g., title, headings, CSS styling, URLs; content is not relevant to the assignment; and content is not well-structured | Missing many required elements OR content is not well-structured | Missing minor required elements but is well-structured | Includes all required elements and is well-structured |
| Meme submission (5 points) | Meme is a repost of your own or others' content; meme not submitted to web portal | Meme is missing required content, e.g., alt text, or alt text is unintelligible | Meme is created de novo for the course and was submitted to the web portal for voting, but may have minor issues (e.g., missing alt text) | Meme created de novo for course, includes alt text, and was submitted for voting |
| Execution (5 points) | A single attempt that neither went viral nor was iterated on, or was a poor fit for the target community; unclear message | Limited viral success or limited iteration, limited fit for the target community; limited clarity and creativity | Had some viral success or iterated moderately; relatively good fit for the community; meme is relatively clear and creative | Meme communicates a clear message in a creative and effective way; meme went viral or demonstrated repeated iterations, learning and improving each time. |
| Reflection (5 points) | Missing content on decisionmaking and/or evaluation of virality; ineffective reflection of why the content was successful or not; missing or misusing course concepts | Surface-level reflection of why the content was successful or superficial engagement with course concepts | Appropriate reflection of why the content was successful or not and some engagement with course concepts. | Strong evaluation of why the content was successful or not and engages with course concepts. |
Extra Credit: Win the Internet
A small number of submissions (1-2) that I determine went most viral, and a small number of submissions (1-2) that win the class vote, will earn 10% extra credit on this assignment. Go for it!
FAQ
- Does it matter how viral my meme actually went?
You are not graded directly on how viral your content went, but instead on your reflections on the experience. (Actual virality will be extra credit.)
- Can I pay for popularity?
No. Just no. Don't pay for post boosting.
- Not fair, my friend knows an influencer!
It's OK. You're not graded on actual popularity. They will probably have a different sort of reflection than you, but it doesn't make your experience trying to make something go viral any less valid.
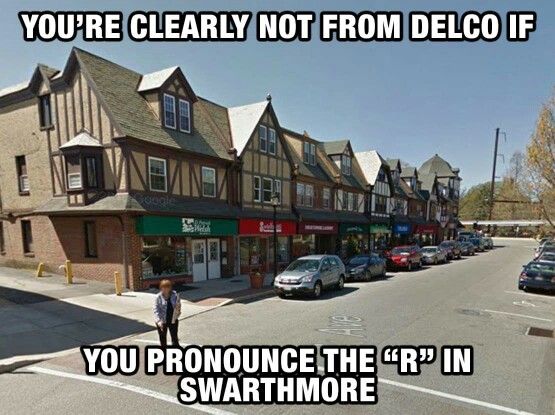
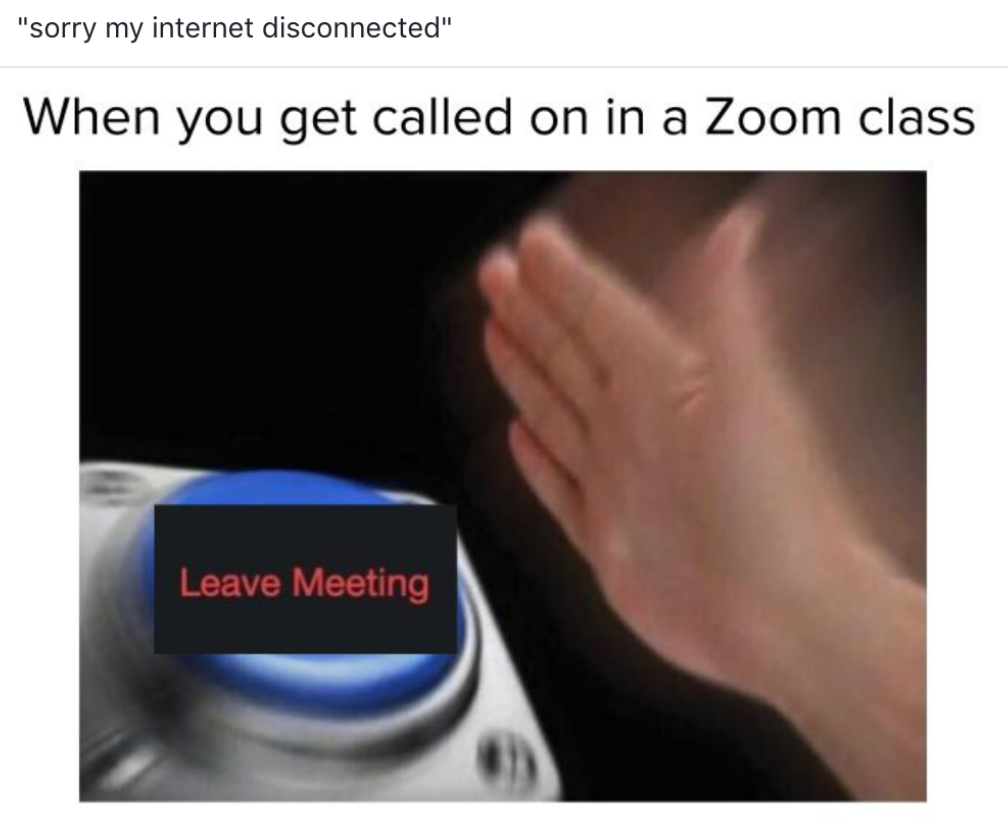
- Do you have examples of memes?
Example Memes

Acknowledgements
Parts of this assignment are adapted from Michael Bernstein's Social Computing course at Stanford University and: (1) an online tutorial and (2) MDN Web Docs.